Project Overview:
This page focuses on what different functions/utilities the helper bot provides to the user and the motivation behind the bot. If you want to see the inner workings of the bot explained then look at this page, and if you want to just see the code then click here for the public GitHub repo of the bot.
A discord bot is a bot that you can add to a discord server (a server is just a collection of users and a series of text and voice channels) which can then manage the server, provide commands, filter messages etc.
There exist many different discord bots already like MEE6 or DYNO and others which all have probably more functionality overall than the helper bot that I have made has. With that being said the issue with these bots is that they are mostly each specialized for one function so like DYNO is built for moderation and discord server management which means if I also want to be able to have a command to do a coin flip or roll a dice then I would need another discord bot like MEE6. This then leads to me having to search multiple sites for all the commands and you also have to hope they use unique identifiers or use different slash commands as 2 bots could use ‘!’ to start their command which would then cause issues. So noticing this issue I decided to make a bot mainly for personal/friend use as I just wanted to have one bot which does everything I need.
Helper bot Functions and commands
This bot runs 24/7 on a VPS and you can add it to your server by clicking Here which gives it permissions to act as an administrator and create application commands (/commands).
Moderation functions and commands
Upon someone adding the helper bot to a server, it will make a moderation channel which will provide the basis for where all logs and moderation-based notices go. This is automatically made, rather than just relying on a user making the channel for simplicity purposes.
Automatic message filtering
Message filtering is per server so one server can have one word banned and another server could still say that word without their message being deleted and vice versa. So this means if the bot is in 100 servers it would have 100 unique banned word lists and depending on where the message comes from leads to what list it is checked against.
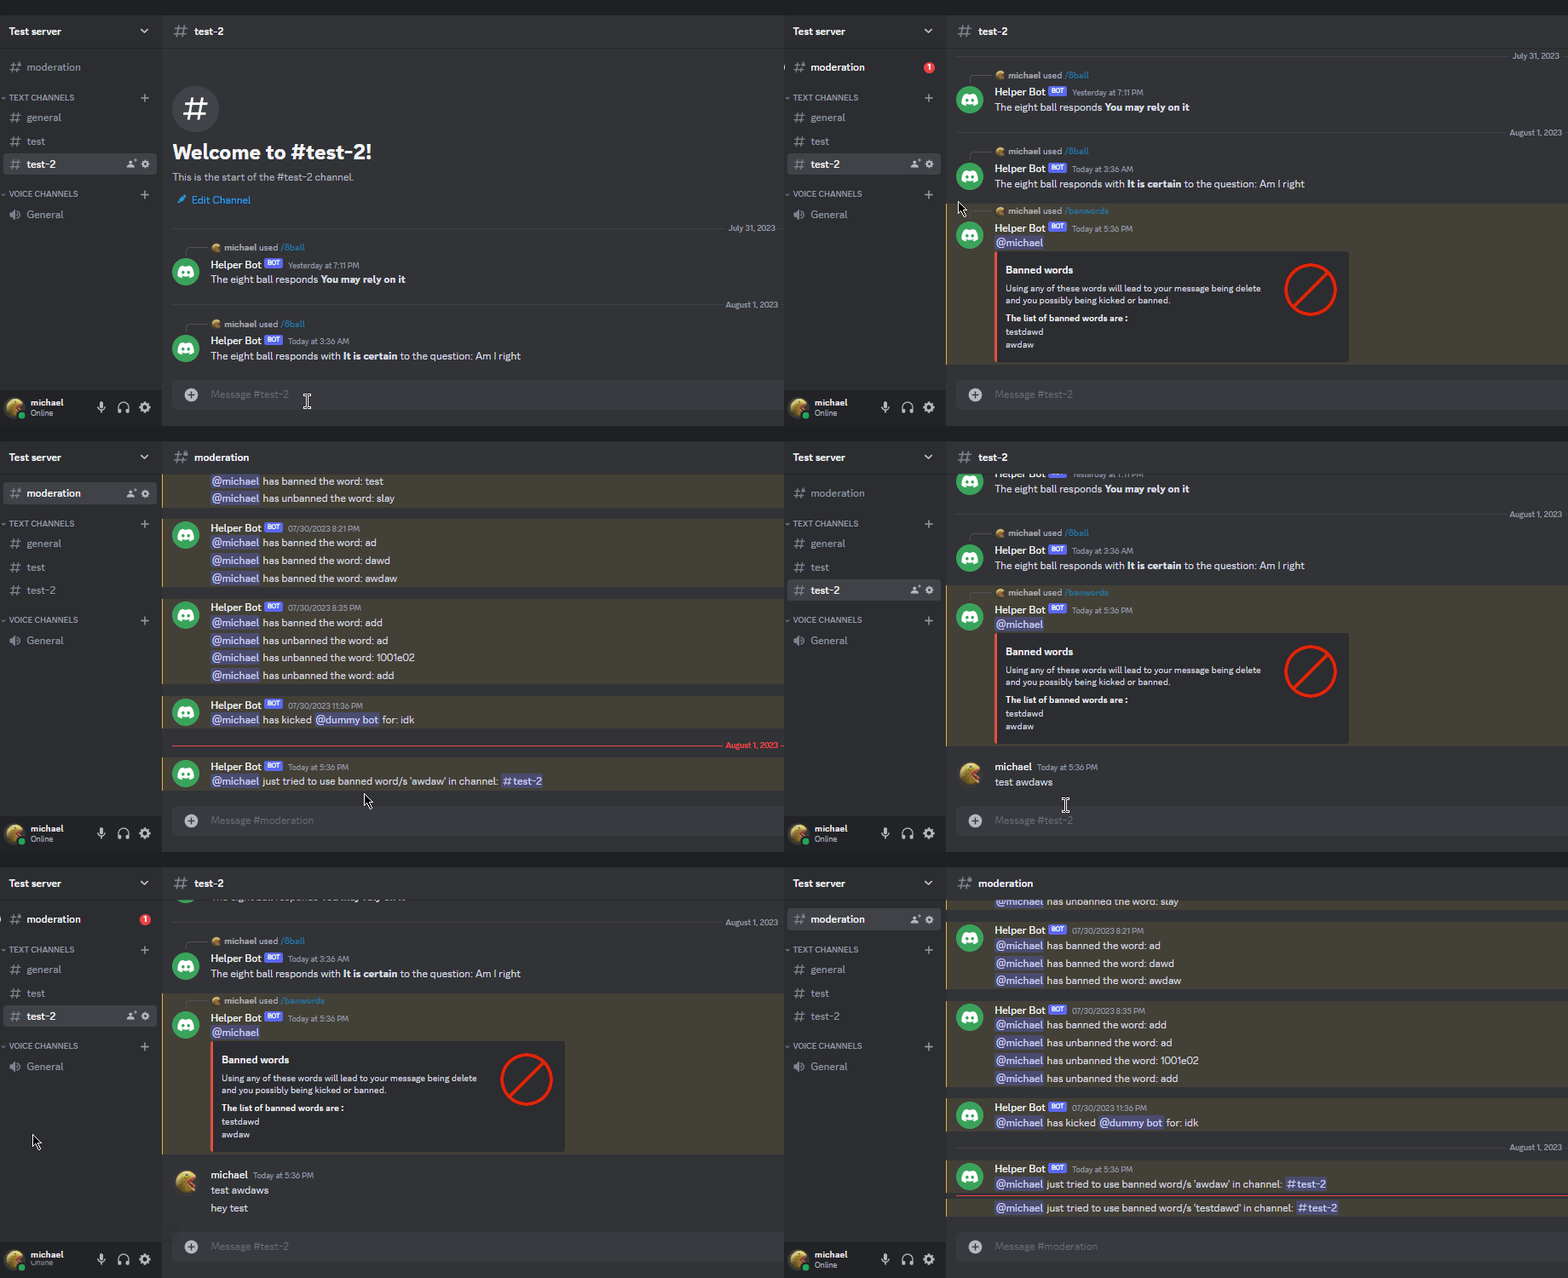
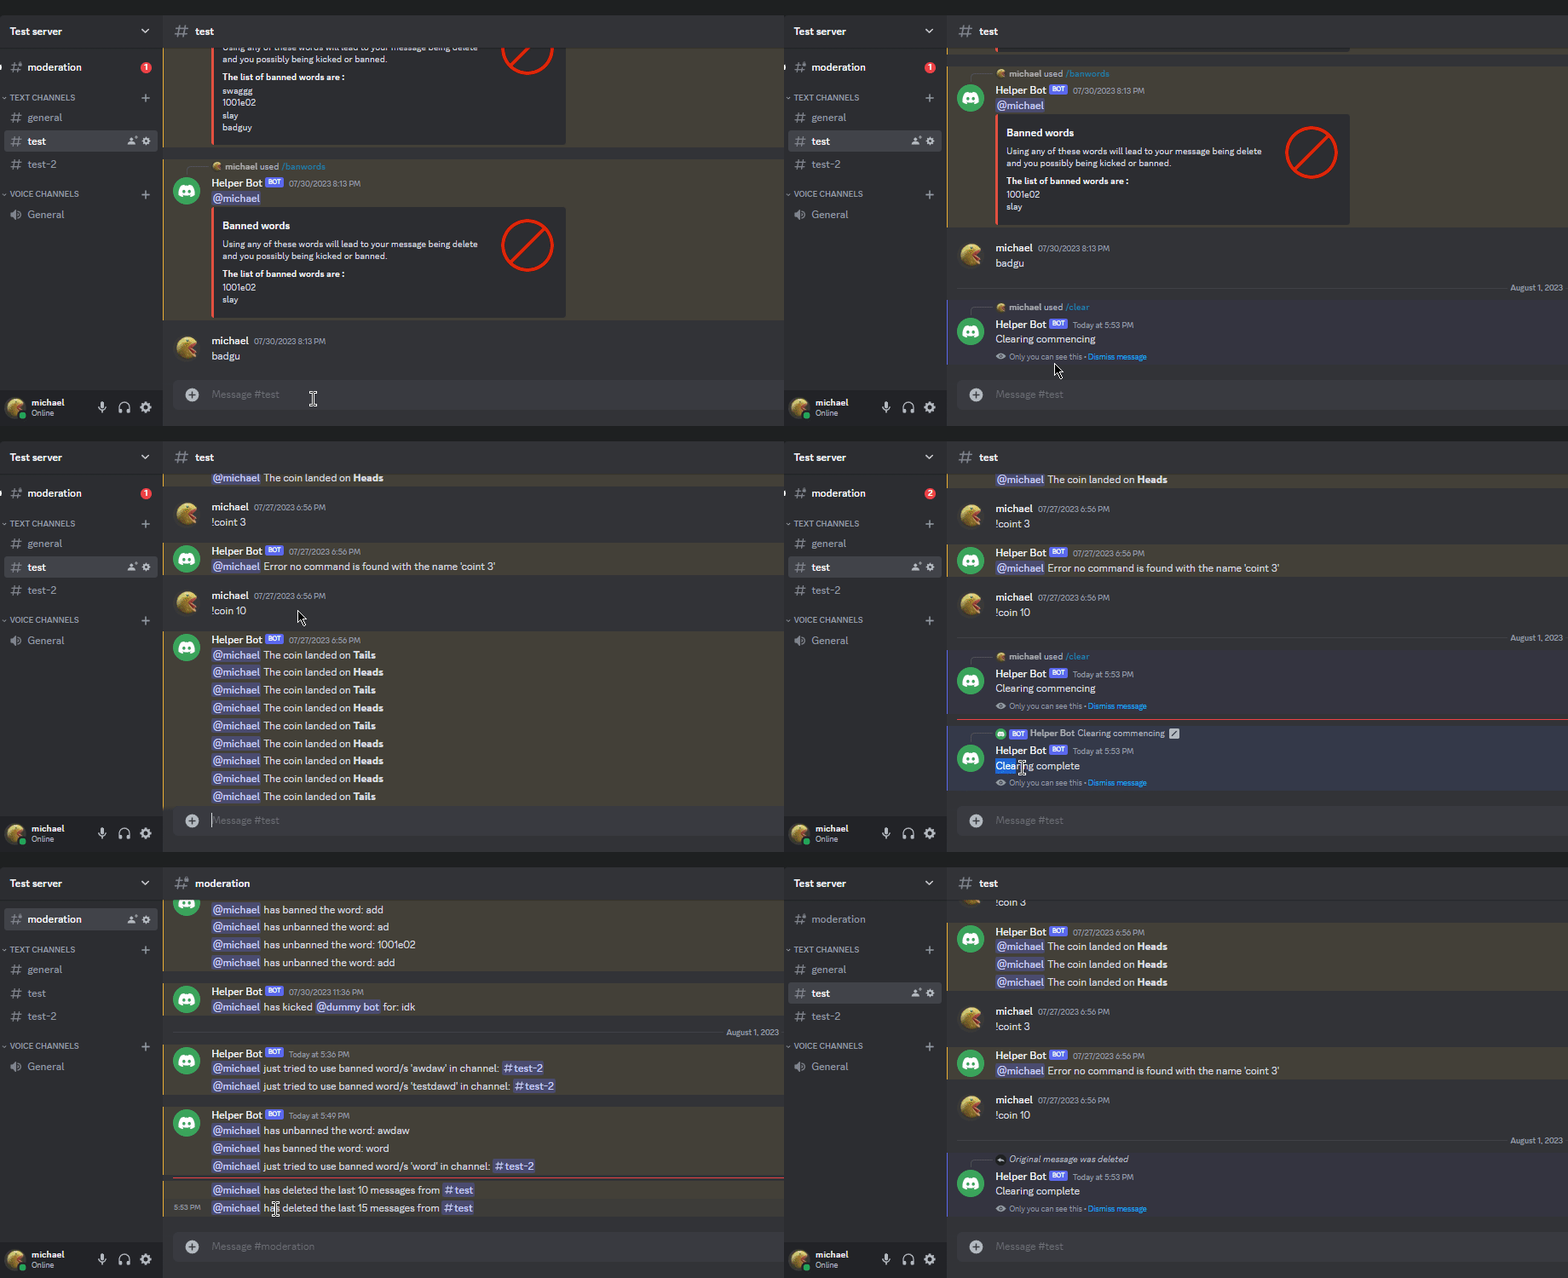
Upon any message getting typed and sent to a server, it is processed by the bot. The bot will check if the words used in the message contain any words which are banned by the server that the message is going to and if so that message will be deleted by the bot and the bot will send a message to the moderation channel. The message to the moderation channel states the user who tried to use the banned word/s, the banned word/s and what channel it happened in.
Below is a gif of this happening:
Adding a new ban word to the message filtering
Command: /banword word
word - The word you want banned from the server
Example use: /banword ‘badword’
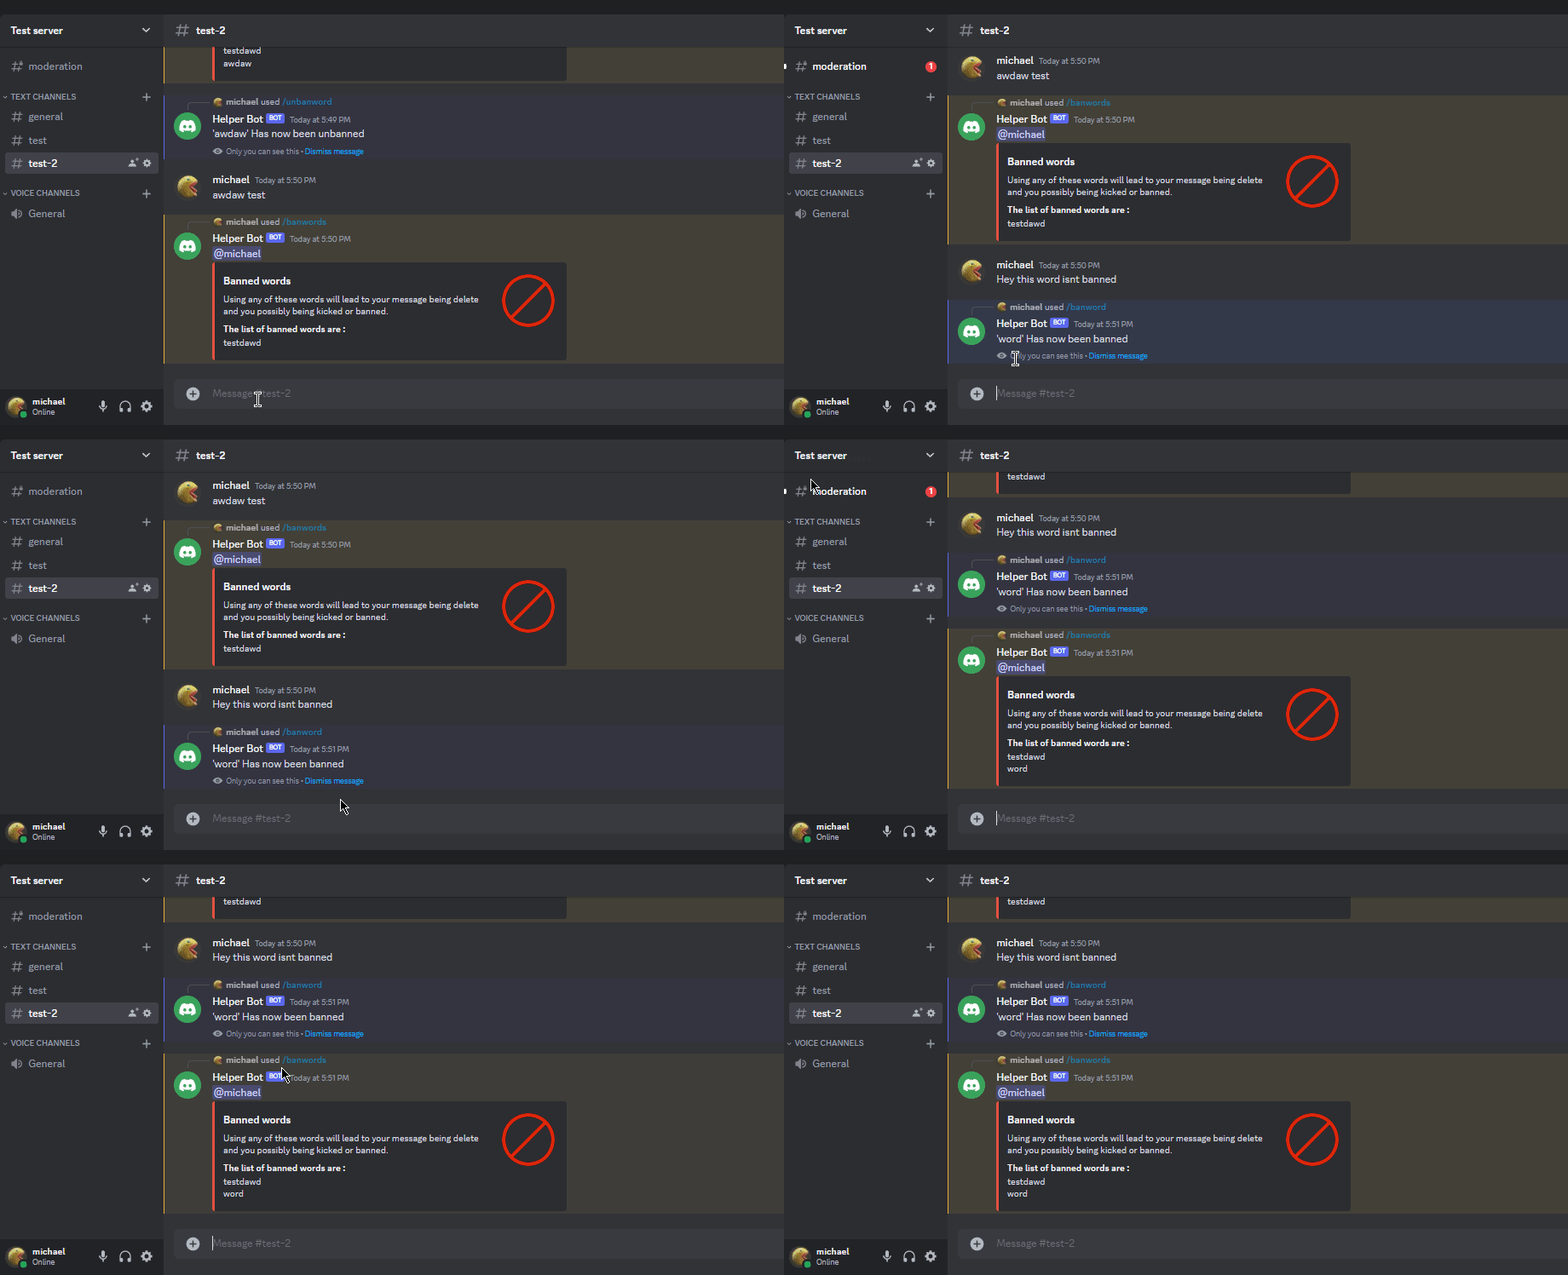
You must be an administrator to use this command, provided you are an administrator to ban a word, simply, all you need to do is /banword then the word you want to ban. What this will do is store that word as a banned word for the server the command was executed on and it will persistently store this so you don’t have to worry about the bot crashing and losing your list of banned words. Upon executing the command the bot will send an ephemeral message so no one but you can see it, the message says the word is banned and then it creates a new log in the moderation channel which will then state which user banned which word.
Below is a gif of this command in use:
Removing a banned word from the message filtering
Command: /unbanword word
word - The word you want unbanned from the server
Example use: /unbanword ‘badword’
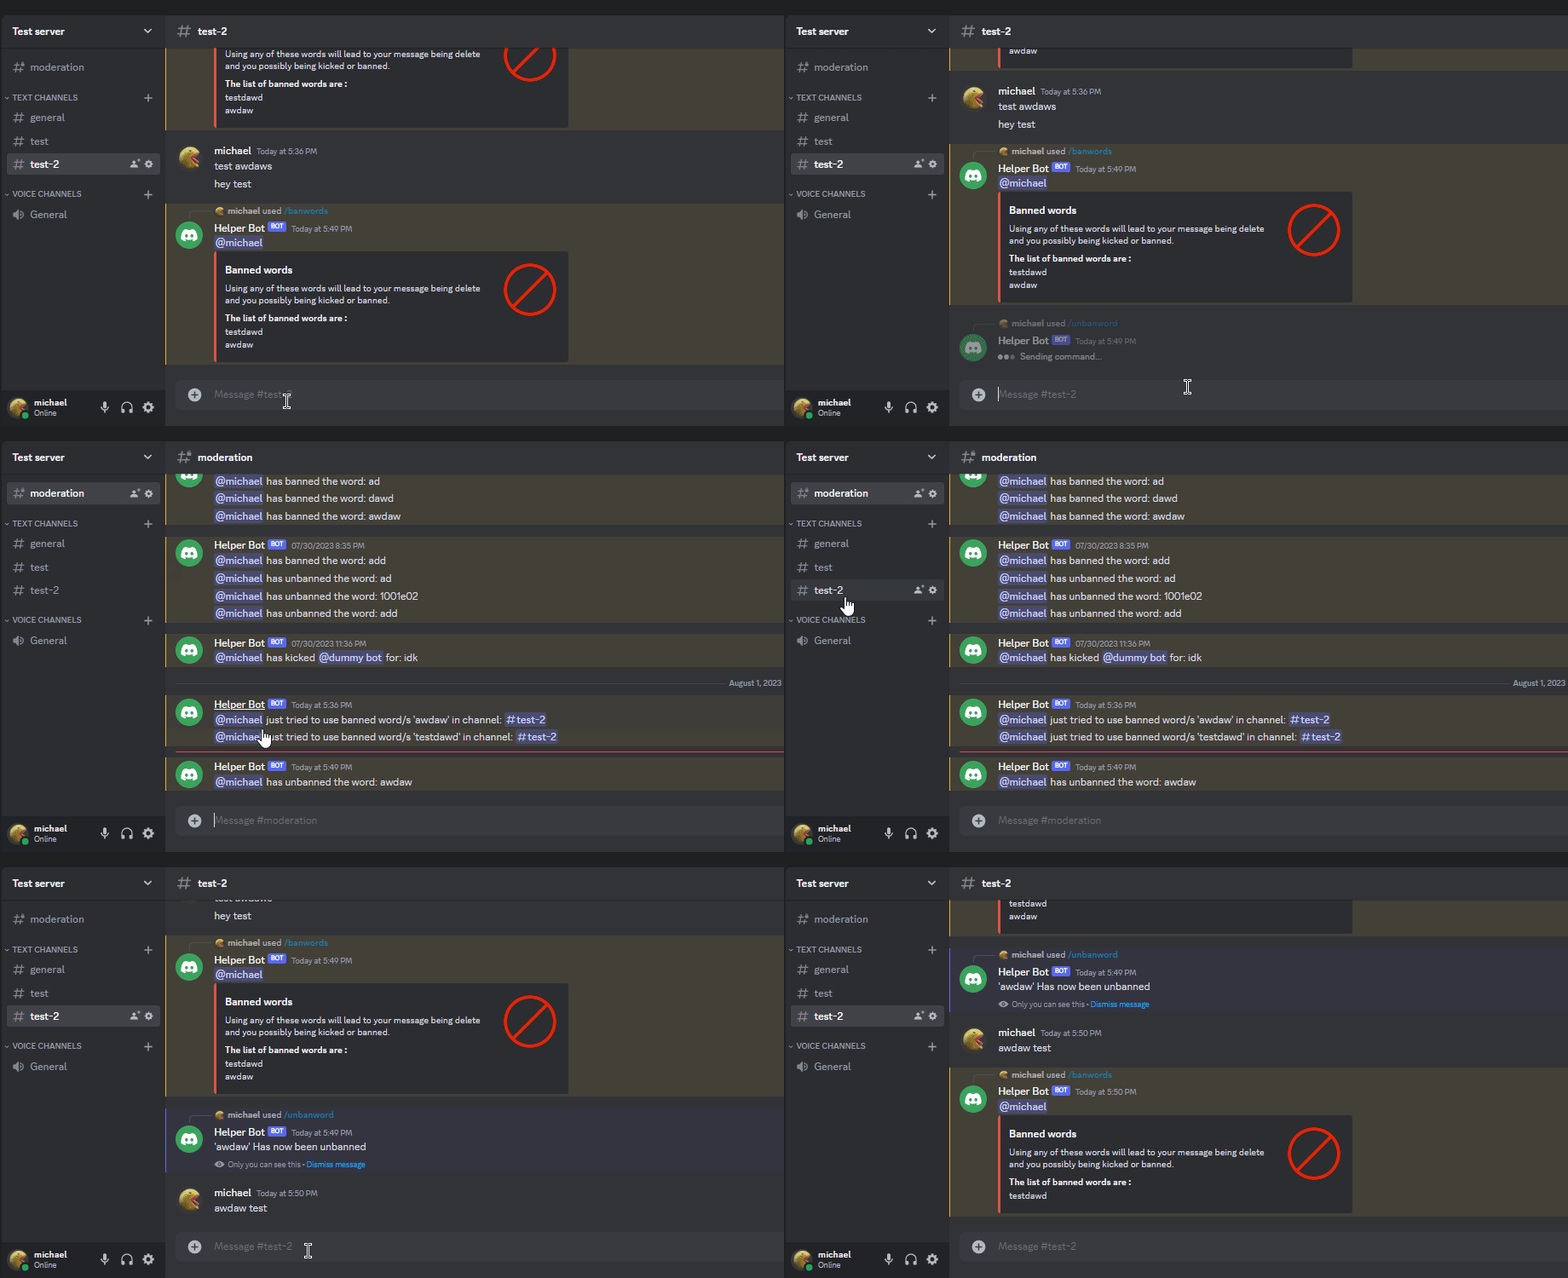
You must be an administrator to use this command, provided you are an administrator to ban a word, to unban a word all you need to do is /unbanword followed by the word that you no longer want to be banned. The message filtering will not filter your message even though it includes a banned word as it checks if the message contains the unbanword command so this command will still pass through the filter and be executed. Upon executing the command the bot will send an ephemeral message so no one but you can see it, the message says the word is unbanned and the bot will then create a new log in the moderation channel which will state which user unbanned which word.
Below is a gif of this command in use:
Checking what words are banned in the message filtering
Command: /banwords
Example use: /banwords
To see all the words which are banned and automatically filtered you can use the /banwords command, this will return a discord embed message that everyone on the server can see with all the words that are banned on this server.
The embed that is returned looks like this:
Deleting Messages from a user or channel
Discord for various reasons has no way on the user side to delete a bulk amount of messages from a channel or a user other than manually deleting each message which is very tedious. They do let you delete up to the last 7 days of a user’s messages if you permanently ban a user but that is all it allows. So below are commands to delete all or a set number of a user’s messages from a channel or server and also commands to delete messages from all users in a channel.
Deleting all user’s messages in a channel
Command: /delete member
member - The member whose messages you want to delete
Example use: /delete @michael
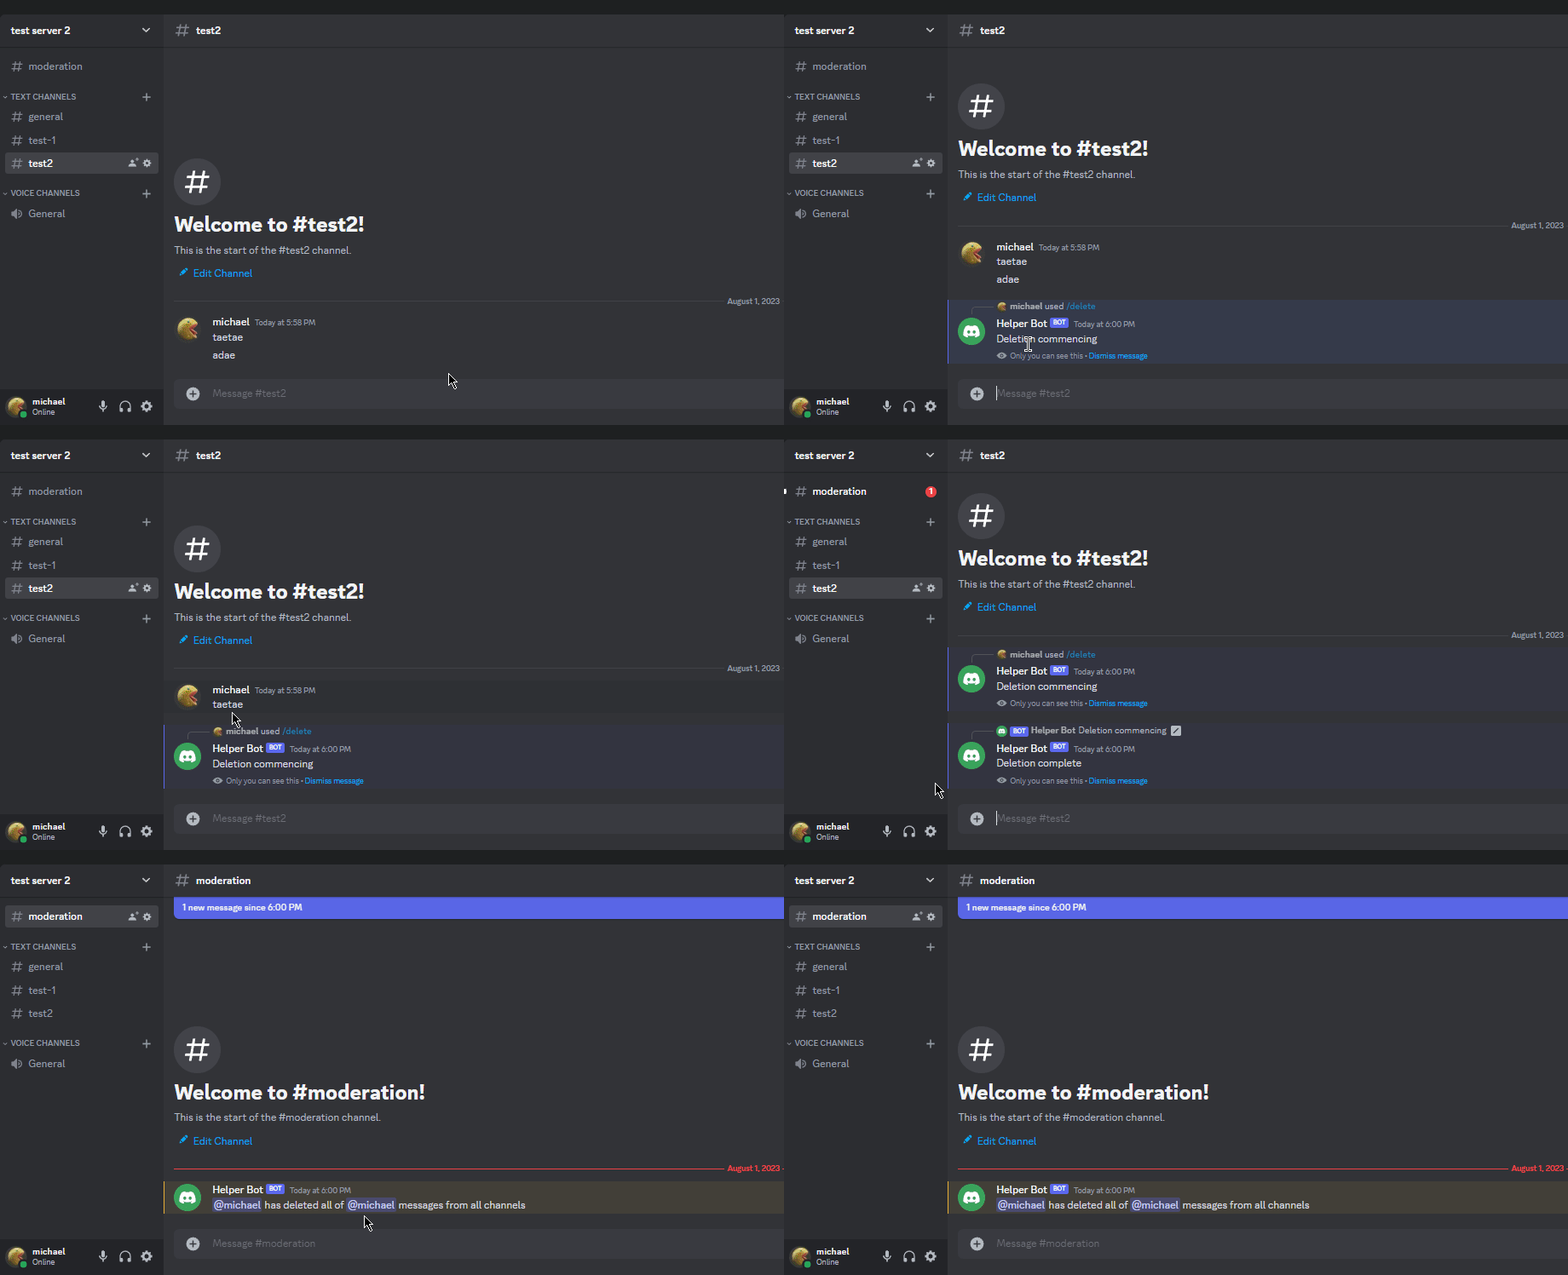
You must be an administrator to use this command, provided you are an administrator to delete all messages from a certain user all you have to do is /delete followed by the @user you want to delete all messages from in this channel. This will lead to all messages from that user being deleted from the channel and it will send an ephemeral message so no one but you can see it saying the deletion has started and that message self-deletes after 10 seconds. Upon completion of the deletion, the bot will send another ephemeral message (this one doesn’t self-delete) to state it has been completed and it will send a message/log in the moderation channel stating the user who used the command, the channel the deleted the messages were from and the user whose message was deleted. It is important to note due to the throttling of discord API it is only possible to delete one message per second, so it will take x seconds to complete with x being the number of messages they have sent in the channel.
Below is a gif of this command in use:
Deleting all a user’s messages
Command: /delete member all
member - The member whose messages you want to delete
all - Optional by default False if set to True deletes the members messages from all channels not just this one
Example use: /delete @michael True
You must be an administrator to use this command, provided you are an administrator to delete all messages from a user from all channels you have to type /delete followed by True after the user’s name. This command works the same as the previous one but will delete all messages from the user from the server. It will also similarly send an ephemeral message to you when it starts and finishes deletion and it will send a message to the moderation channel stating which user deleted the messages and the user who had their message deleted. Furthermore, this command suffers the same throttling of 1 message being deleted per second.
Below is a gif of this command in use:
Deleting the last x messages from a channel
Command: /clear amount
amount - The number of messages you want deleted from the channel
Example use: /clear 10
You must be an administrator to use this command, provided you are an administrator to delete a certain number of messages from a channel you type /clear followed by the number you want deleted. The command will then delete the last x messages in the channel and this command works faster than delete with it being able to delete 100 messages every 3 seconds (more on why this is the case on the other page). Once it starts deleting it will send an ephemeral message so no one but you can see it saying the deletion has started and that message self-deletes after 10 seconds. Upon deleting the messages, the bot will send a message to the bot channel saying who deleted it, the amount they deleted and what channel. It will also send another ephemeral message stating that it has deleted all the messages.
Below is a gif of this command in use:
Kicking and banning a user
Both Kicking and banning exist already default unlike all these other commands I have mentioned, so the reason for these commands is to extend what the existing kicking/banning does. So the bot adds to the preexisting commands by direct messaging the user who was banned stating why they were banned and by adding the reason to the moderation channel so that all logs are stored in one channel.
Kicking a user
Command: /kick user reason
user - The person you want to ban
reason - The reason why they are being banned
Example use: /kick @michael ‘idiot’
You must be an administrator to use this command, provided you are an administrator to kick a user all you need to do is type /kick followed by the user and then the reason. Kicking a user means that they are forcibly removed from the server but they can join back given a invite. Once the command is executed then the user will be kicked and the bot will send a message to the moderation channel stating who kicked who and the reason It will also send a direct message to the user who was kicked stating why they were kicked.
Below is a gif of this command in use:
Banning a user
Command: /ban user reason
user - The person you want to kick
reason - The reason why they are being kicked
Example use: /ban @michael ‘idiot’
You must be an administrator to use this command, provided you are an administrator to ban a user all you need to do is type /ban followed by the user and then the reason. Banning is a permanent version of kicking and it makes it so that the user is forcibly removed from the server and cannot join back even if given an invite. Once the command is executed then the user will be banned and the bot will send a message to the moderation channel stating who banned who and the reason. It will also send a direct message to the user who was banned stating why they were banned.
Below is a gif of this command in use:
Clock functionality
Stopwatch
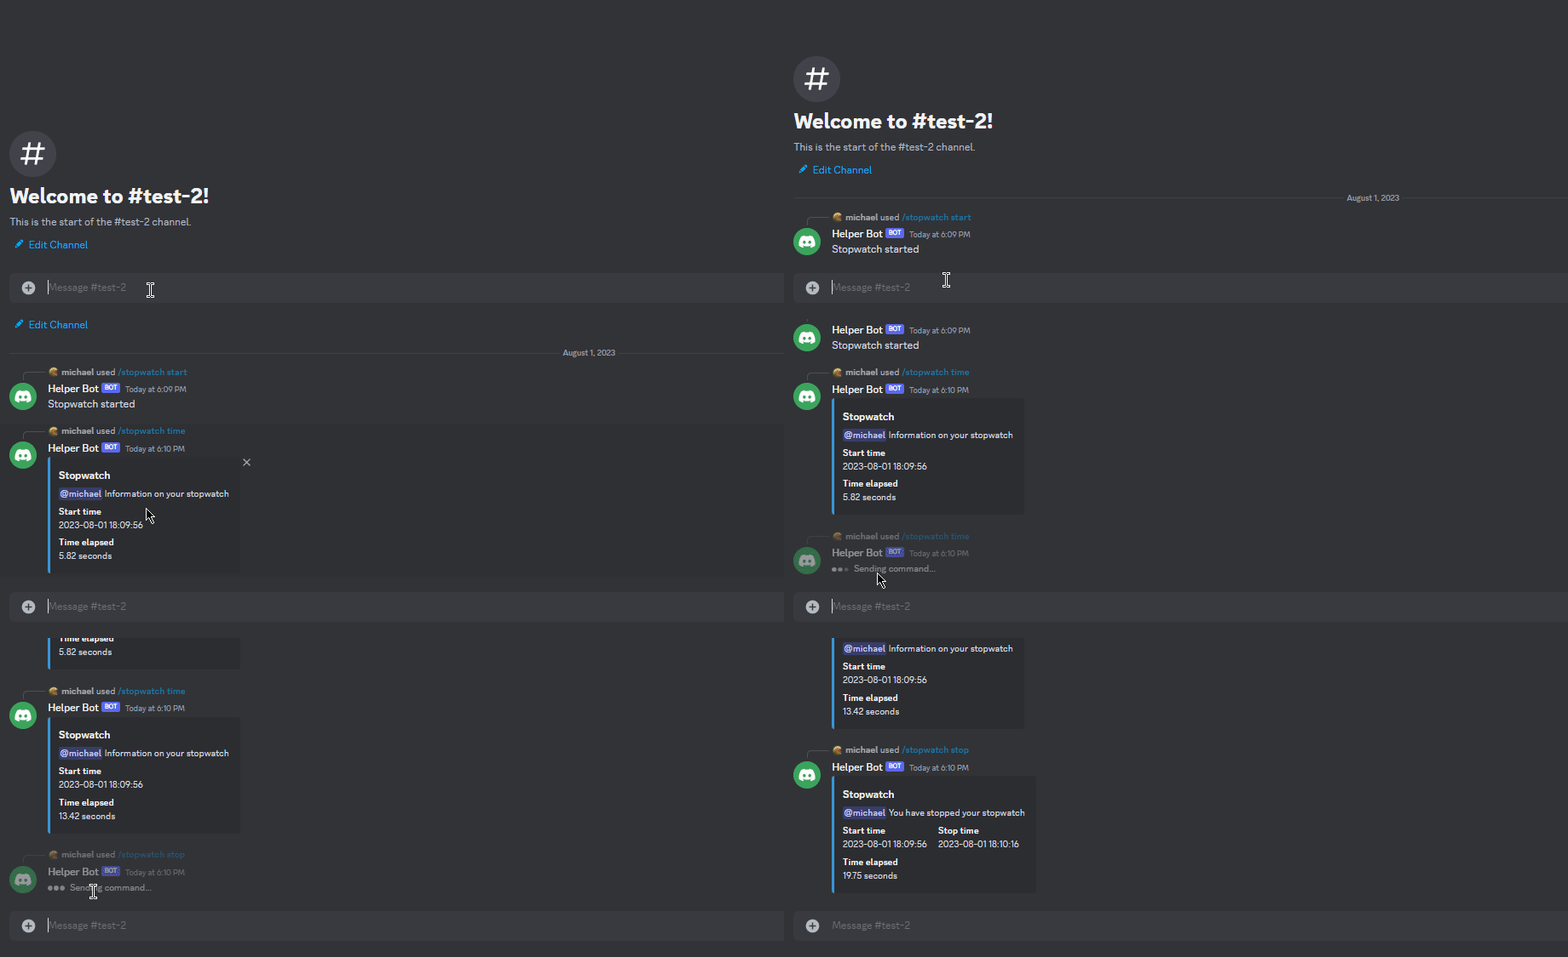
The stopwatch has 3 subcommands that provide you with the functionality of what a normal stopwatch would have. You can start stop and check the time of the stopwatch, all formatted nicely with embedded discord messages.
Below is a gif of the stopwatch functionality working with all 3 command variations:
Starting the stopwatch
Command: /stopwatch start
Example use: /stopwatch start
To start the stopwatch all you need to do is type /stopwatch start and then the bot will respond telling you the stopwatch has started. If start the stopwatch again at any point it will just reset/restart.
Checking the stopwatch
Command: /stopwatch time
Example use: /stopwatch time
To check when the stopwatch was started and how long it has been going all you need to do is type /stopwatch time. You can check the time however many times you want without any issues. Upon entering the command the bot will respond with a discord embed message with the start time and the amount of seconds passed.
The embed message looks like this:
Stopping the stopwatch
Command: /stopwatch stop
Example use: /stopwatch stop
To stop the stopwatch all you need to do is type /stopwatch stop. Upon entering the command the bot will respond with a discord embed message with the start time, end time and the amount of seconds passed.
The embed message looks like this:
Timer
Command: /timer hours minutes seconds
Hours - Optional by default 0 and its the amount of hours you want the timer to go off in
minutes - Optional by default 0 and its the amount of minutes you want the timer to go off in
seconds - Optional by default 0 and its the amount of seconds you want the timer to go off in
Example use: /timer 1 10 10
You can get the bot to notify you after a set amount of time by typing /timer followed by the number of hours, minutes and seconds that you want to wait. It’s optional to enter hours, minutes and seconds meaning if you only want to wait seconds you don’t need to fill out the hours or minutes as it defaults to 0.
Below is a gif of the timer command working:
Here is a screenshot of the 1 hour timer going off which was set at the end of the gif:
Countdown
Command: /countdown x
x - The number you want the countdown to start at
Example use: /countdown 3’
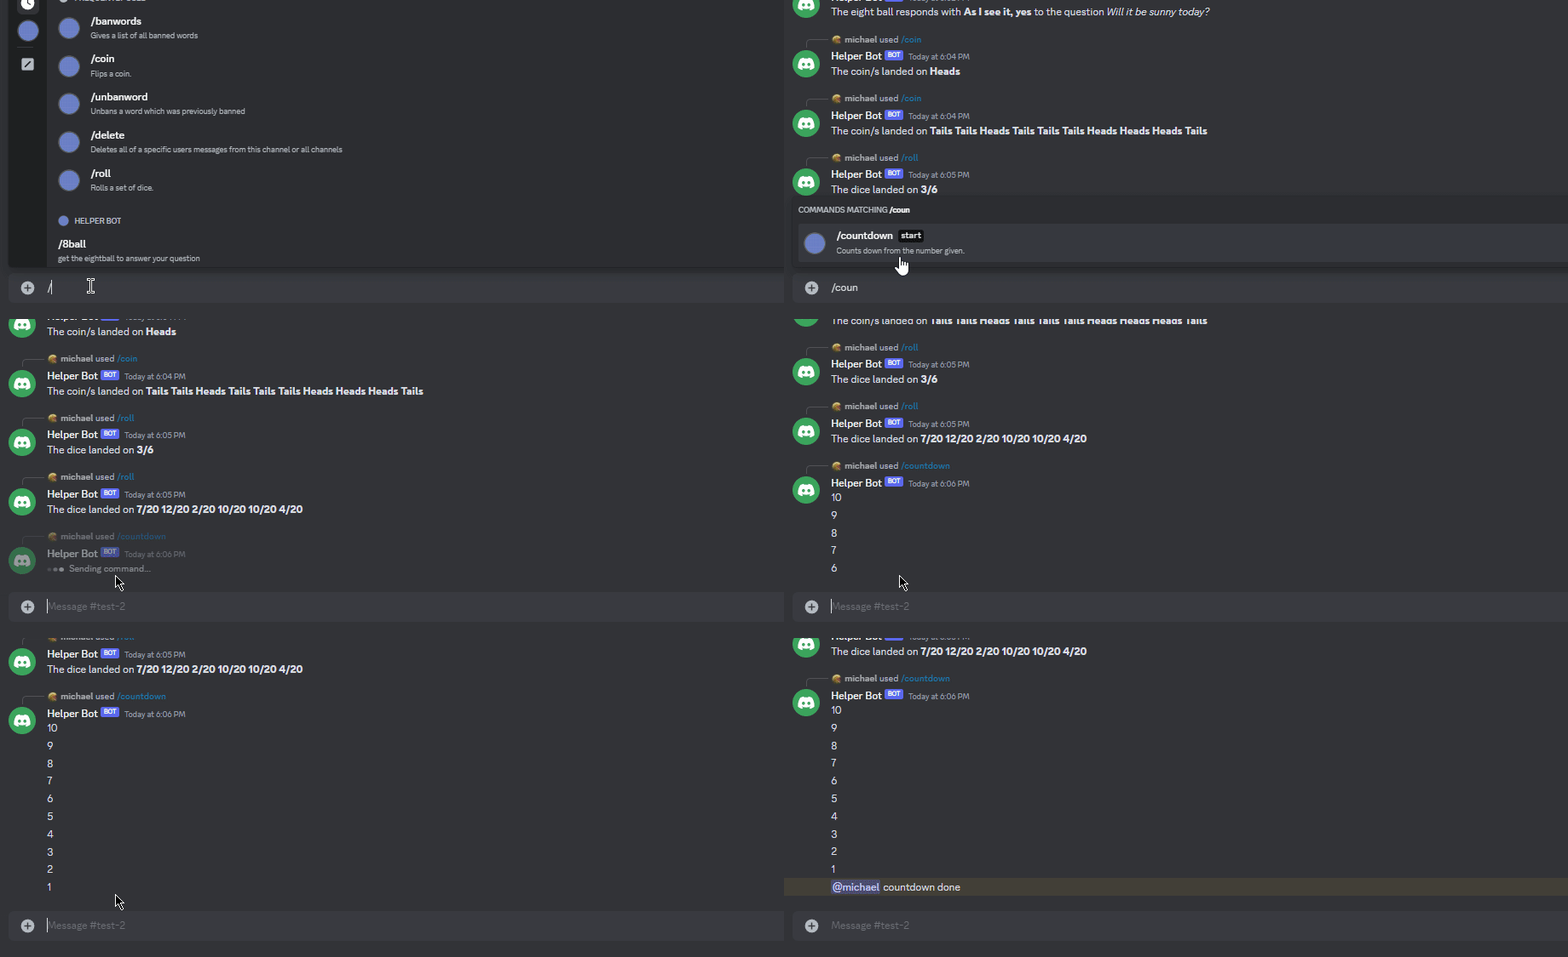
You can get the bot to countdown from a given number by typing /countdown followed by the number you want the bot to countdown from and after reaching 1 the bot will notify you stating it’s finished.
Below is a gif of the countdown command working:
Fun functionality
Eight-ball
Command: /8ball question
question - The question you want the 8-ball to answer
Example use: /8ball ‘will it rain?’
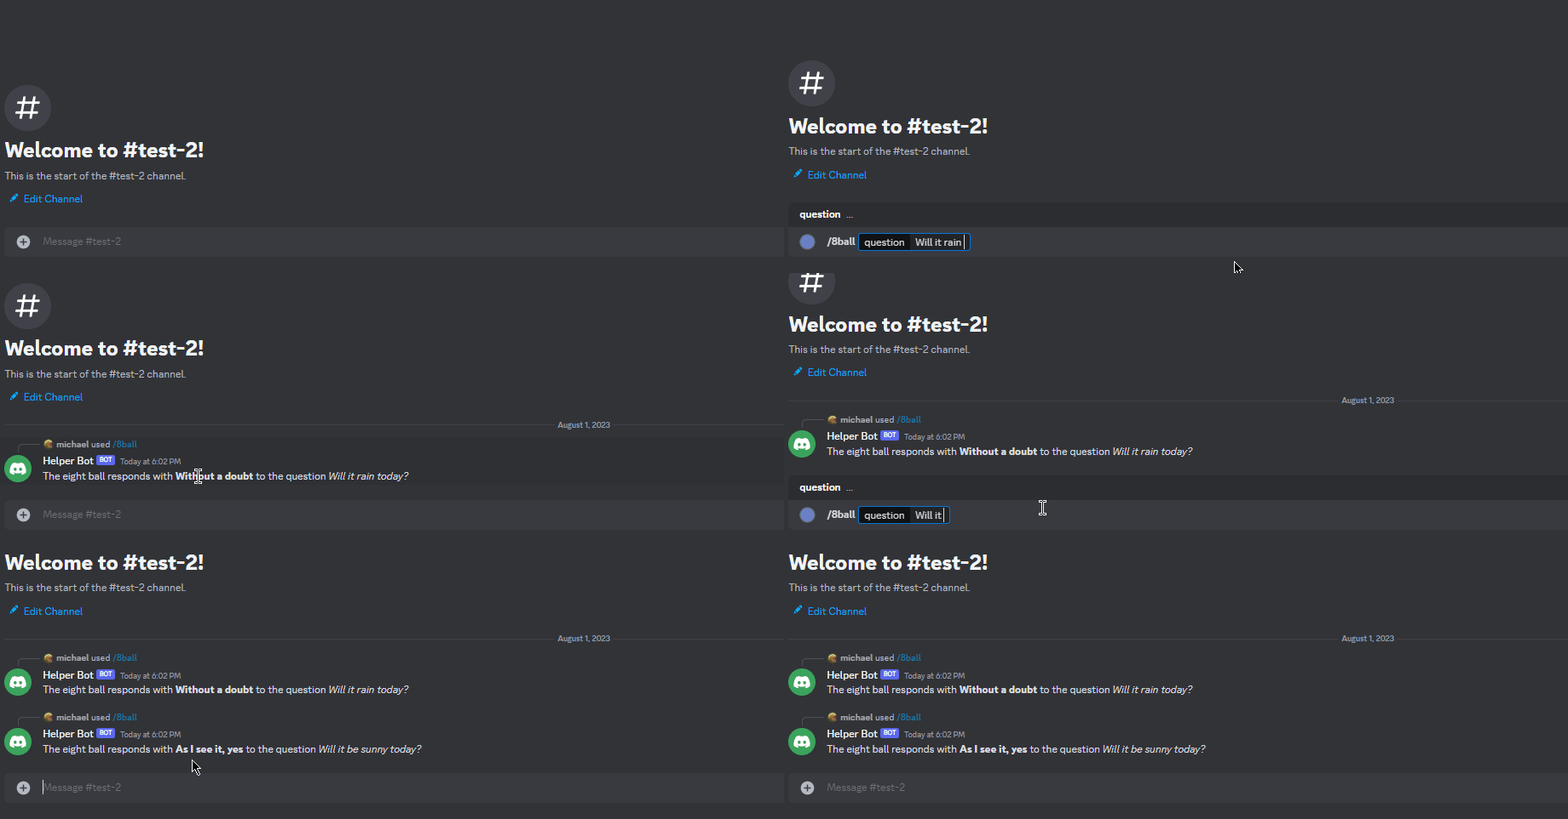
You can get the bot to answer your question with an eightball response by typing /8ball followed by the question you want the bot to answer. The bot will then respond with a random answer from the possible answers an eight ball could give.
Below is a gif of the eight-ball flip command working:
Coin flip
Command: /coin times
times - The number of times you want to flip the coin
Example use: /coin 2
You can get the bot to flip a coin or multiple coins by typing /coin followed by the number of times you want the bot to flip the coin. The bot will then respond with a series of results (heads and or tails).
Below is a gif of the coin flip command working:
Dice rolls
Command: /dice amount sides
amount - The number of dice you want to roll
sides - The number of sides on the dice
Example use: /dice 1 6
You can get the bot to roll dice for you by typing /dice followed by the amount of dice you want it roll and the number of sides on the dice. The bot will then respond with the roll result of the dice.
Below is a gif of the dice roll command working:
Messaging functionality
Greeting
Command: /hey
Example use: /hey
The bot can greet you if you type /hey it will respond with Hello followed by your name.
Below is a gif of the greeting command working:
Mirror
Command: /mirror message
message - What you want the bot to repeat
Example use: /mirror ‘I am not a bot’
The bot can anonymously send your message to the channel by typing /mirror followed by the message. The bot will then respond with an ephemeral message which will delete instantly so that no one can see that you sent the message and then the bot will simply send your message to the channel.
Below is a gif of the mirror command working:
Forwarding
Command: /forward member message
member - Could be a group or user (example @user or @role) that you want to anonymously recieve the message
message - What you want to forward to the group or user
Example use: /forward @michael ‘stop that’
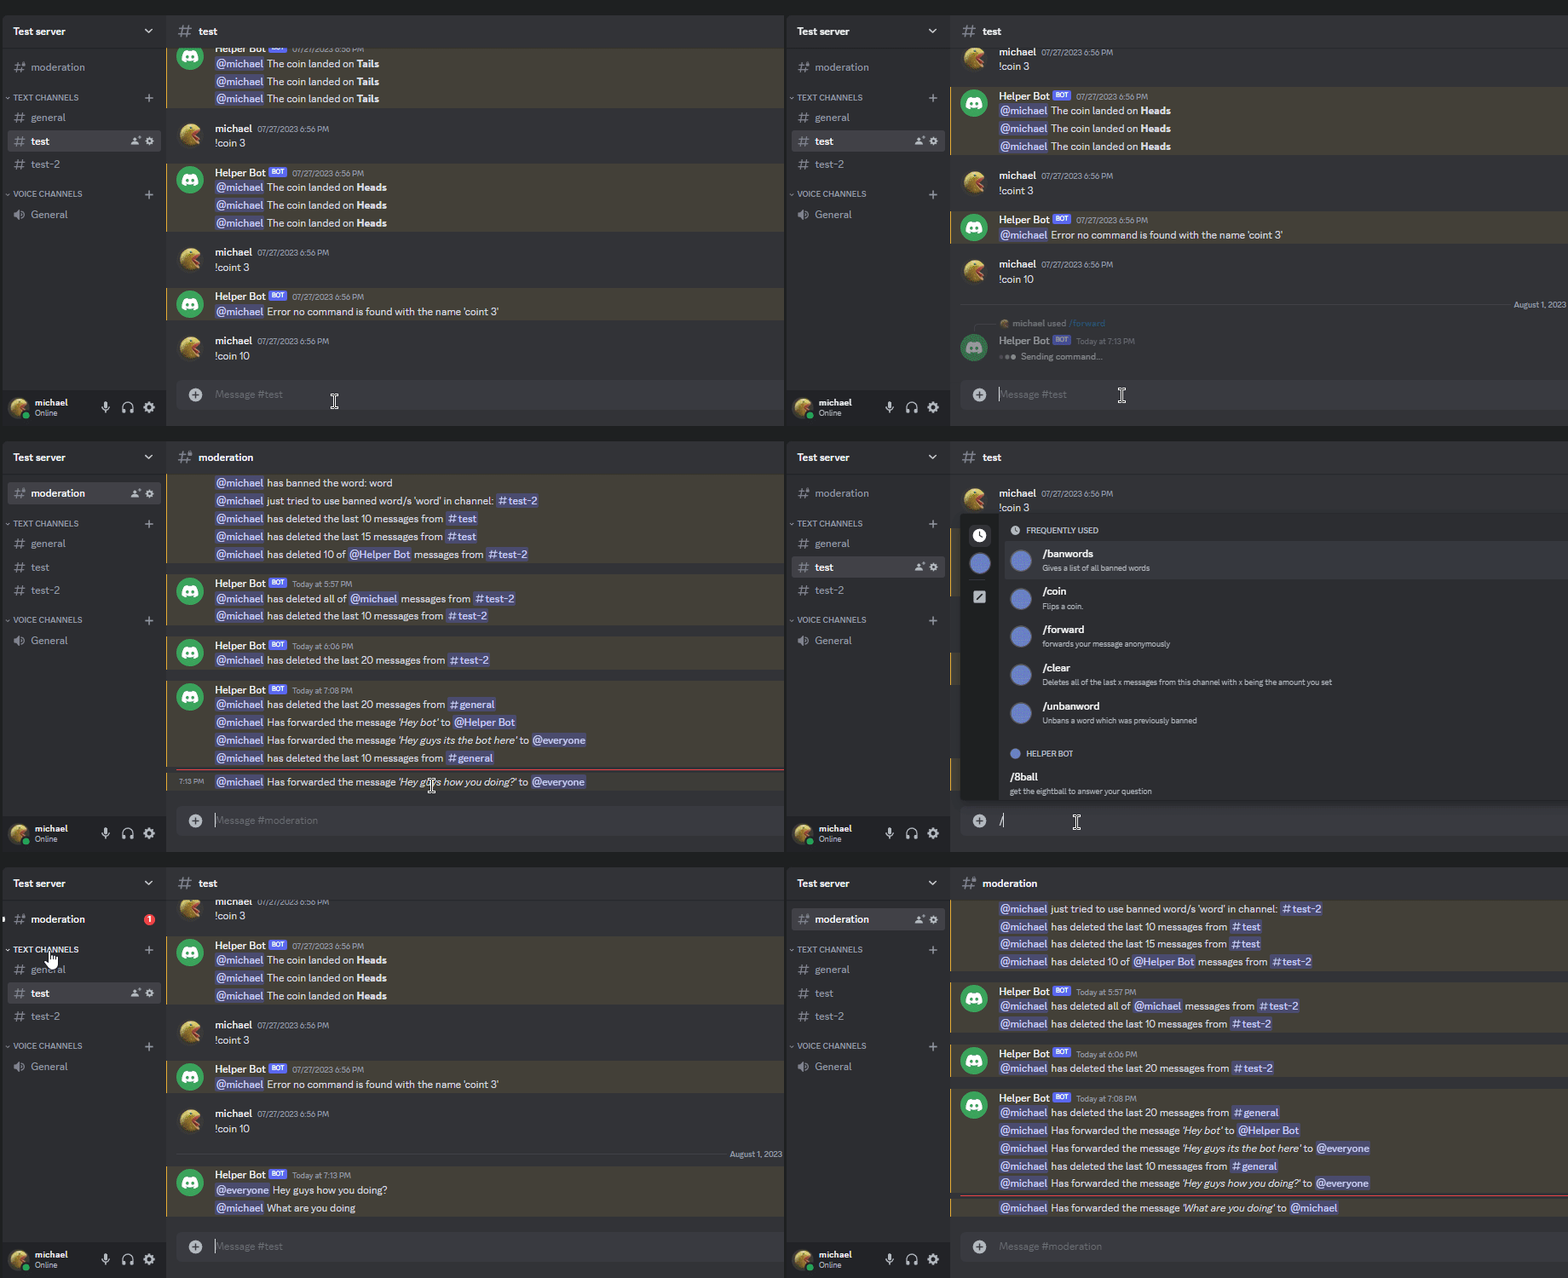
The bot can anonymously forward your message to someone in the channel by typing /forward followed by the person or group you want to mention and the message. The bot will then respond with an ephemeral message which will delete instantly so that no one can see that you sent the message and then the bot will forward the message by mentioning the person in the channel and then sending your message to the channel. This command doesn’t need you to be an administrator however it does send a log to the moderation channel stating who got the bot to forward the message, what the message was and who it was to.
Below is a gif of the forwarding command working:
Spam
Command: /spam member times
member - Could be a group or user (example @user or @role) that you want to notify
times - How many notifications you want to send to the user or group
Example use: /spam @everyone 10
You can spam a group or user by typing /spam followed by the number of times you want to notify them. The bot will then reply to that command (everyone can see who told the bot to spam) and send that many messages with them mentioned.
This command does not send a log to the moderation channel as everyone can see who got the bot to do it, and if administrators get annoyed by this command you can disable it by adding /ban to the banned word list
Below is a gif of the Spam command working:





Comments powered by Disqus.